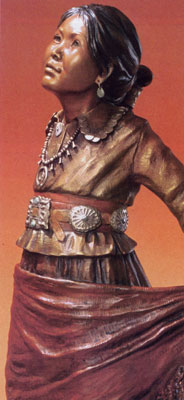
Susan Kliewer Sedona Monthly 2006
By Medicine Man Gallery on

Click to view available sculptures by Susan Kliewer
Published online courtesy Sedona Monthly, 2006
Susan Kliewer is one of Sedona's best-known sculptors, with two new large bronzes - one to be installed in Uptown as part of the Sedona Main Street Program, and another in Tlaquepaque - joining her three standing prominent pieces on public display, including the 10-foot bronze of town namesake Sedona Schnebly. For an artist whose work is so visible on the landscape, we thought it would be interesting to see the part of her creative process generally hidden from view - how such sizable sculptures come to be. Susan agreed to give us a necessarily simplified guided tour through the arduous journey from idea to finished product. On the following pages, she'll walk us through the steps from conception to working with the clay to the rooms of the foundry - she worked in one before devoting herself to sculpture full time - to final delivery. Susan typically does three or four sculptures a year, as well as strictly limited editions.
Coming up with the idea
Susan: "It happens in various ways. A lot of ideas just spring from everyday life. Sometimes I'll meet someone who's a great model and I'll design a piece because of that person. My husband and I attend pow-wows and historical reenactments, and we take lots of photos for later reference. Many of my inspirations for sculpture have come from our road trips through the west."
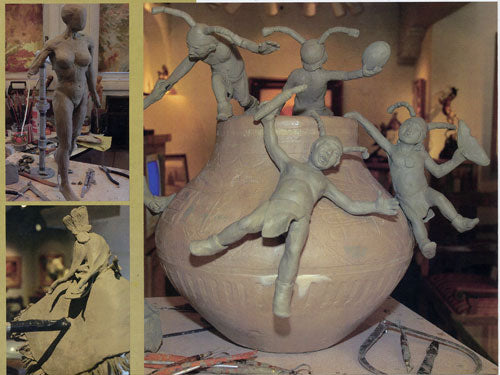
Working with the clay in the studio
"Oil clay never hardens. That's the beauty of it; you can work with it for years. I bought an old-fashioned turkey roaster to heat my clay in. It warms the clay to a perfect consistency for sculpting."
Visualizing proportions for the armature
"Building the armature isn't easy for me. You're working with plumbing wire and air, trying to visualize the finished product. I find it helps me to make a sketch that's the actual size of the piece and use it as a guide. The proportions have to be accurate when the sculpture's completed."
Getting to work
"It's always a good feeling to finish the armature and begin 'bulking up' the clay. It takes me about three or four months to finish a piece, depending on its size and complexity. If I get an idea for a new piece while I'm working on another, I will switch over and start it while it's fresh in my mind. When I get back to the piece I stepped away from, I may change things up a bit - I usually find taking a break is beneficial. I see the piece with a fresh eye."
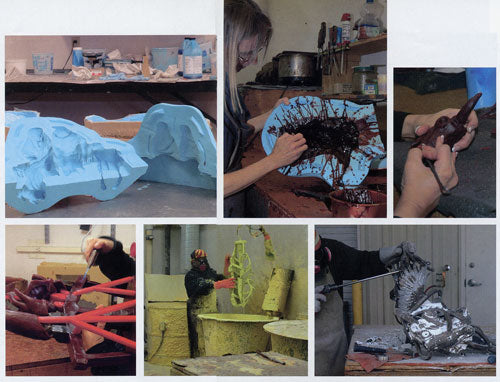
At the foundry: making the mold
"When I've finished the sculpture, I pick it up, still attached to a board, and take it to the foundry. It's important that the piece I take to the foundry is really the way I want it; I don't want to suddenly look at it differently a few weeks later. I've had that happen a few times, and then I have to go and fix it at the foundry, and that can be a mess.
The first stop at the foundry is the mold room. There, the mold maker will plan the mold, which is made with layers of silicone rubber followed by a plaster 'mother mold'. This 'mother mold' helps retain the rubber's shape when waxes are being made in it, or when it is stored. Each layer of rubber takes a day to cure (a catalyst is added to each batch of rubber). An average size mold takes about two weeks to complete."
Making the waxes
"Hot wax in the mold is painted by hand. The first coat is painted at 225 degrees. It must be done carefully to prevent bubbles. Bubbles in the wax will cause pits in the bronze when it's cast. The wax worker builds up cooler and cooler layers of wax until it's about a quarter of an inch thick.
"Certain parts of the sculpture, like arms and legs, need to be cut off the piece to avoid undercuts. These parts are put in their own separate mold. They will be poured solid with wax and then attached to the main body of the wax. Later, the wax touch-up person - who uses a hot tool to attach parts - will remove seam lines."
Waxes are 'gated'
"The touch-up waxes (which look exactly like my original sculpture) go to the next step, where wax bars and wax sprues are attached. Eventually, 'gates' become channels for the molten bronze to fill the sculpture. It takes a lot of planning in this 'gating' stage to make a good casting. You have to be sure trapped air has channels to escape and turbulence from the bronze being poured must be dispersed."
Into the slurry room
"After the gating is complete the piece goes to the slurry room. The wax is dipped in a vat of slurry, which is silica in suspension, and dusted with fine sand. After each coat the piece is hung up to dry. Each coat is allowed to dry for 24 hours. Eight coats make up the finished shell around the wax."
Burn out
"From there the invested wax is placed in the burn out furnace. After an hour in the furnace, the wax melts out of the slurry or ceramic shell. Leaving its impression inside. Thus, 'Lost Wax."
Pouring the Bronze
"The ceramic shell is heated again while the furnace is heating to 2,200 degrees. Ingots of bronze are placed in the crucible and placed inside the furnace to melt. When the bronze reaches 2,200 degrees, the pouring crew places the hot, empty ceramic shell in a sandbox. They take the crucible out of the furnace with tongs and fill up the shells.
"After the bronze cools down, the hard slurry gets knocked off the surface with a hammer and chisel - gates are cut off with a welder and the bronze is sandblasted."
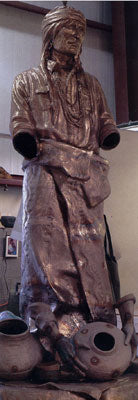
"Chasing" the sculpture
"Skilled foundry workers use welding machines and power tools to retexture seams and assemble the bronze. A good casting is important to shorten this step. When completed, the bronze is sandblasted again."
The Patina
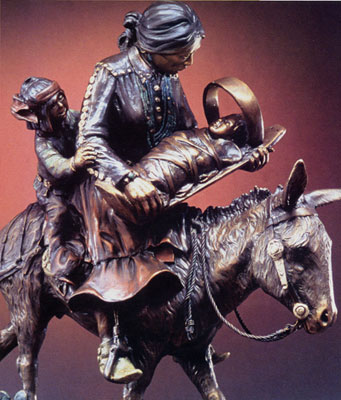
"The patina person may have his or her own recipes for achieving certain colors with chemicals. This part of the process is extremely important. I confer with the patina person and together we work out the first patina in the edition. It's like picking the perfect frame for a painting - the patina must fit the piece.
"The bronze is heated with a torch and chemicals are painted on to oxidize the metal. The bronze must be the right temperature to take the chemical. It's really an art when it's done well. It takes a special touch. You want to see the bronze shine through the translucent color.
"Back when I started working at a foundry, most bronzes were done in a patina of 'Cowboy Brown,' which was achieved by mixing two chemicals together. Since those days, foundries have begun experimenting, particularly here in Sedona, and patinas have become more unique and colorful. Each casting is slightly different. Temperature and weather always will be a factor with the patina.
"I think it helped me a lot as a sculptor to have experience working in a foundry. I learned a lot from the artists that were there. Often, they talked about what makes a good piece and what doesn't work so well. And that experience means I can help the foundry too; I know little tricks that make it easier for them."
Final finishing
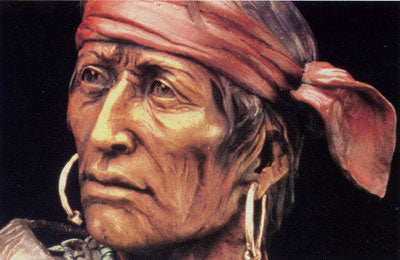
"The patina bronze is mounted on a walnut or marble base which has had a turntable fitted underneath. A plate is attached to the base with the name of the piece and my name engraved on it. A coast paste wax is brushed on to seal the patina and bring out its luster.
"At this point, the finished bronze is shipped to it new owner. Completed pieces go out in order of purchase. Nowadays the mold is so good that the last piece [cast] is no different at all from the first piece. There was a time you wanted to have No.1 or No.2 in an edition for top quality. These days, somebody can come in and be the first person to buy, but they may specifically request No.8, say, signifying a birthday, a wedding anniversary, high school football letters - buyers come in with all kinds of personal associations like that. So we cast them that way. It's a fun aspect of it."
